Ink and toner
Toner vs Drum Unit: What Each Does and When to Replace It
Written by Printer Co editorial team · Updated
The toner vs drum unit question comes up the first time a laser printer asks for a part you did not know it had. Both are consumables, both affect print quality, and on some printers they live in the same box while on others they are bought separately. Knowing which is which saves you from replacing the wrong part, and from paying for a drum when all you needed was toner.
What toner does
Toner is a very fine dry powder made mostly of plastic resin and pigment. It is what ends up on your page. A laser printer does not spray it; it places it electrically and then melts it onto the paper with the heated fuser, which is why pages come out warm.
Toner is used up as you print. Each cartridge has a rated page yield measured with standard test pages, so the more text and graphics you print, the faster it empties. Our guide on how long toner lasts explains those yields and why your real count is often lower.
What the drum does
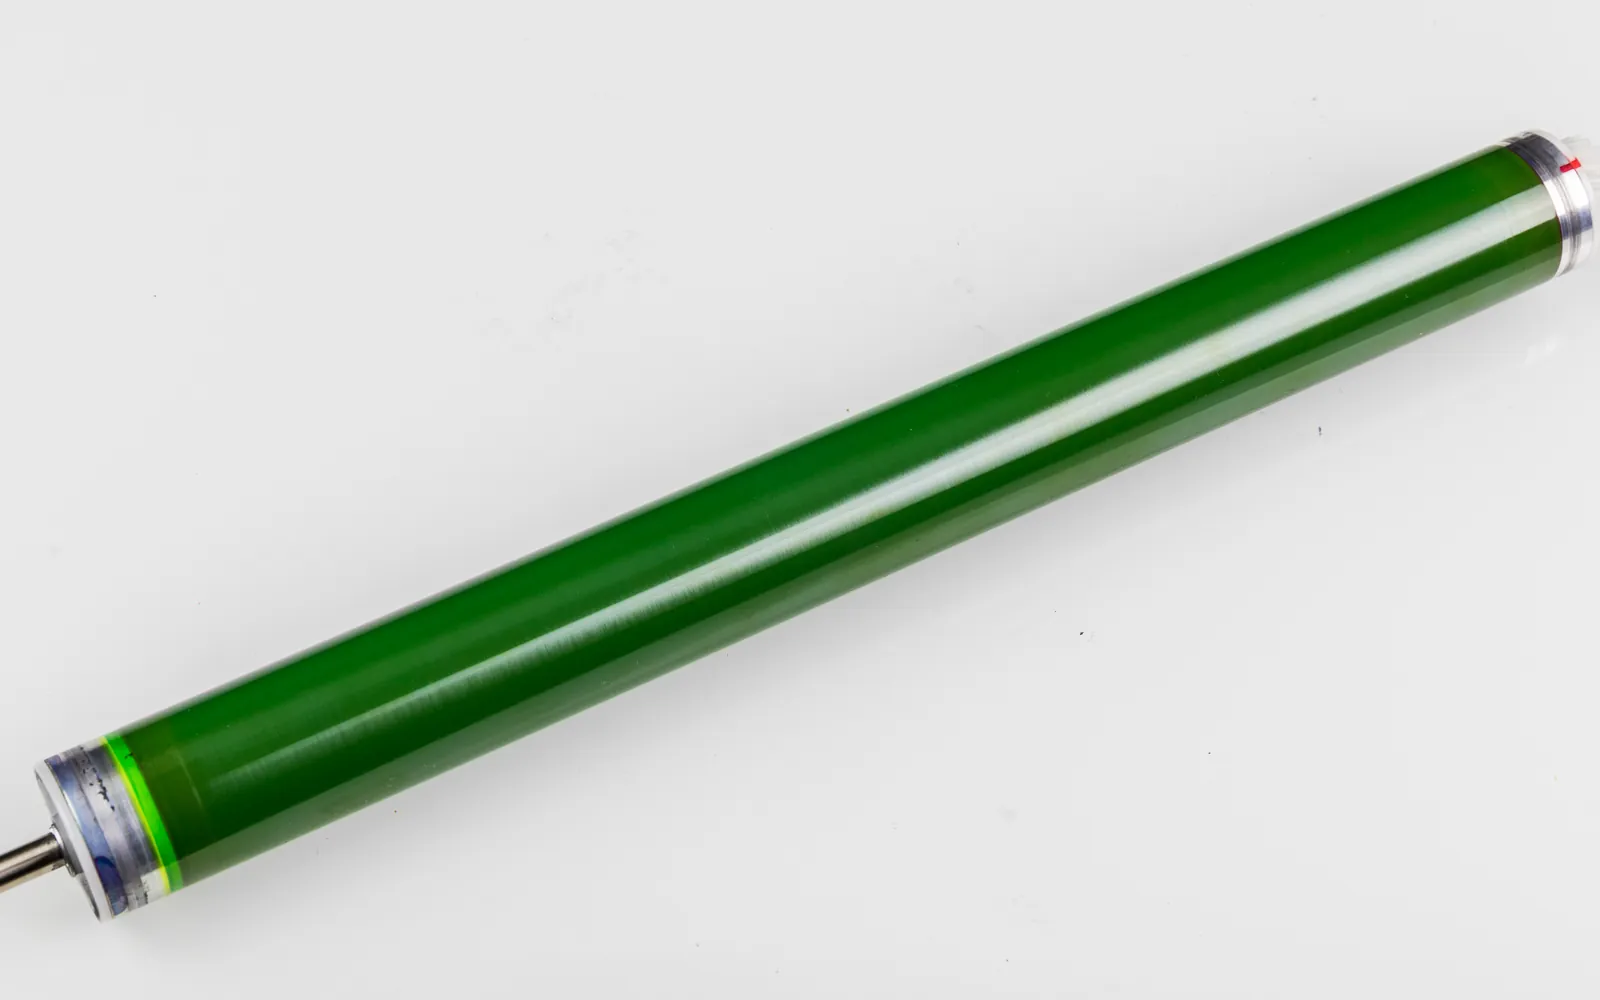
The drum (also called the imaging drum or photoconductor) is a roller coated with a light-sensitive layer. On many printers you can see it as a smooth green or blue cylinder. During each page:
- The drum surface is given an even electrical charge.
- A laser or LED array changes the charge on the drum where text and images should appear.
- Toner sticks to those areas, so the drum now carries a powder copy of your page.
- The drum rolls against the paper and the toner moves onto it.
- The fuser melts the toner into the paper, and the drum is cleaned and recharged for the next turn.
The drum is not used up like toner, but its coating wears with every rotation and every sheet of paper rubbing past. Brother’s own explainer describes the drum as a part that wears slowly and can last through several toner cartridges. Eventually it can no longer hold a clean image, and print quality drops.
Combined cartridges vs separate drum units
Laser printers follow one of two designs, and the label on your cartridge or the supplies list in your manual tells you which you have.
| Design | What you replace | Typical trade-off |
|---|---|---|
| Combined (all-in-one) cartridge | Toner and drum together, every time | Simple: one part, one warning. You pay for a new drum with every cartridge. |
| Separate toner and drum | Toner often; drum occasionally | Toner cartridges can cost less, but you must budget for the drum and track two warnings. |
Neither design is automatically cheaper. To compare, add the drum’s cost per page (drum price divided by its rated pages) to the toner’s cost per page, as described in our printer cost per page guide. Look up the rated life of each part on the maker’s supplies page for your exact model rather than relying on a typical figure, because ratings vary widely between printers.
If you are still choosing a printer, this is one of the details worth checking before you buy; our laser vs inkjet printer for home comparison covers the other running costs.
Signs of low toner
- The printer shows a toner low or replace toner message.
- Pages are evenly lighter than usual, or pale in patches, often in a vertical band.
- Faded areas improve briefly after you remove the cartridge and gently rock it side to side, if your manual allows this.
Signs of a worn or damaged drum
- The printer shows a drum end soon or replace drum message, while toner reports plenty left.
- Repeating marks: a dot, smudge or faint line that recurs at the same distance down the page. The spacing matches the circumference of the roller causing it.
- Light grey background shading, or a faint ghost of earlier text, that stays after you fit new toner.
- Streaks or spots that remain after replacing the toner cartridge.
Repeating marks are the most useful clue because you can measure them. Your printer manual usually has a troubleshooting table that lists the spacing for each roller. For example, Brother’s support pages for several of its models tie dots repeating every 94 mm to something stuck on the drum, and describe a drum dot check page to locate it. The distance is different on other printers, so always use the table for your model.
How to check which part is worn
- Read the printer’s message and note whether it names toner, drum or both.
- Print the printer’s own quality or test page instead of judging a single document.
- If pages are faded or patchy and the toner is low, replace the toner first.
- If marks repeat, measure the spacing and match it with your manual’s table.
- If you have a new toner cartridge, fit it and print again. A fault that survives new toner on a separate-drum printer points to the drum.
- Replace the part the evidence points to, and reset the drum counter if it was a drum.
Streaks that run the whole length of the page in the same place can also come from a dirty corona wire or a scratched drum, so check whether your manual describes a cleaning step before buying anything.
Resetting the drum counter
Printers with a separate drum keep their own count of how much the drum has been used, and that count drives the drum warnings. On many models the printer cannot tell by itself that a new drum went in, so it needs to be told. Brother’s replace-drum instructions, for example, say you must reset the drum counter after installing a new drum unit, and give the steps in a separate topic for each model.
The steps differ by maker and model. Some use a menu on the display, some a button sequence with the cover open. Search your maker’s support site for your exact model and “reset drum counter”, and follow that page.
Do not reset the counter on an old drum just to clear the warning. The printer will stop nagging, but the drum keeps wearing, and you lose the one signal that tells you why quality is dropping.
Handling toner and drums safely
- Do not touch the drum surface. Brother’s cleaning guide says to hold the drum unit only by its ends or wheel. Skin oil and scratches show up as marks on every page.
- Keep it out of strong light. The drum coating reacts to light. Brother warns that an unpacked drum left in direct sunlight, or room light for long periods, may be damaged. Install a new drum soon after unpacking, and cover a removed drum with paper if you must set it down.
- Lay it on paper. Place a removed cartridge or drum on a sheet of scrap paper in case loose toner falls out.
- Clean spills with cold water or a dry cloth. Toner melts with heat, so warm water can set a stain. Avoid household vacuum cleaners for large spills.
- Use only dry cleaning on the drum. Brother’s guide warns against sharp objects or liquids on the drum surface.
Moving a laser printer
A laser is less fussy to move than an inkjet, because there is no liquid ink to leak, but the toner and drum still need care. Loose toner can spill inside the printer if it is shaken or turned over, and the drum should not be exposed to light for long. The simplest approach is to leave the toner cartridge and drum installed, close every cover, tape them shut, and carry the printer level in its box or well padded. Keep it away from heat and damp in the car or in storage. Our guide on how to move a printer has a full checklist, including what to do when you set it up again.
Ordering the right toner and drum
On printers with a separate drum, the toner and the drum have different part numbers, and one letter can separate a standard-yield toner from a high-yield one or a different printer family. Read the numbers from the parts themselves or from the maker’s supplies list for your exact model before ordering; our guide which ink cartridge do I need explains the same checks for ink, and they apply to toner too.
Recycling used toner and drums
Do not put used toner cartridges or drum units in household rubbish if you can avoid it. Many makers run take-back programmes for their own supplies; Brother in the United States, for instance, offers prepaid return labels for its toner and drum units. Check your maker’s recycling page for your country, and keep the new cartridge’s box to pack the old one. For other electronics and supplies, the US EPA’s electronics recycling page explains how to find certified recyclers and retailer take-back schemes. Our recycle ink cartridges guide covers the options in more detail, and most of them accept toner too.
Quick decision guide
- Toner low, pages faded: replace the toner.
- Drum message, toner fine: replace the drum, then reset the counter.
- Repeating marks: measure the spacing and match it to your manual before buying anything.
- Combined cartridge printer: any drum problem is solved by the next cartridge, so just replace the cartridge.
Frequently asked questions
What is the difference between toner and a drum unit?
Toner is the dry powder that becomes the text and images on your page. The drum is a light-sensitive roller that picks up toner in the shape of your page and transfers it to the paper. Toner is used up as you print; the drum wears more slowly.
Do I need to replace the drum when I replace the toner?
Only if your printer uses a combined cartridge, in which case the drum comes with every new toner cartridge. If your printer has a separate drum unit, it usually lasts through several toner cartridges and is replaced only when the printer asks or print quality shows drum wear.
How do I know if it is the toner or the drum?
Print a few pages and read the printer's status. Faded or patchy pages with a toner low message usually mean toner. Marks, dots or lines that repeat at the same distance down the page, or problems that stay after you fit new toner, usually mean the drum.
Should I reset the drum counter?
Reset it only after installing a new drum unit, following the steps in your printer's manual. Resetting an old drum hides the warning but does not restore the drum, and print quality can keep getting worse.
Can I clean a drum unit instead of replacing it?
Sometimes. If a spot of debris such as label glue is stuck to the drum, some makers describe a check page that shows where the mark is and how to wipe that spot gently with a dry cotton swab. A worn drum cannot be cleaned back to new.
Sources
Editorial team
The Printer Co editorial team researches and writes independent guides to home printers, ink and printing costs, using manufacturer documentation, standards bodies and consumer-protection sources.